Thursday, 23 August 2012

Nail : Half moon w bling bling rhinestone

Hi guys, today is a very simple half moon nail style with ...
a little "bling blink" haha~ ^^ 


Video demonstration:


To begin with, let's take a look at the thing you need to prepare.

Preparation:
1) PritiNYC #705 2-in-1 Top/base coat
It is important to find a base coat that is toxic chemical free, as this is the 1st layer to get in contact with your nail, also act as a barrier to keep you away from all those unknown toxins.


2) GOSH #44 Snow


3) Bourjois #10 Rouge Poppy


4) Seche Vite Dry fast top coat


5) Round stationery sticker


Additional tools for rhinestone

a) Dotting tools / tooth pick


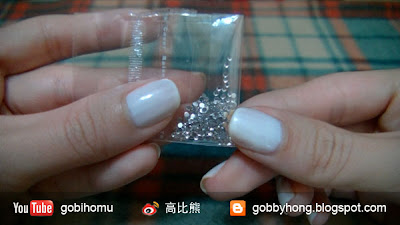
b) Rhinestone


Step:
1) Base coat and base color
Apply base coat to protect your nail and follow with 2 coat of white nail polish, wait dry!


2) Stick on sticker
Use stationery sticker, stick it right on the nail bed, my nail is pretty big so I am doing it a bit further so the half moon will look more obvious.

Remember to stick it tight so the nail polish won't leak into the gap. 


Probably will look like this when done~ :P


3) Color coat
Paint your nail with any color that you love, I've obsess with this bring coral red color from Bourjois. So bold and bright but femmine. ^^


4) Remove sticker
Use a tweezer to remove the sticker right away before the nail polish dry.


You can probably stop right here and add top coat as finish steps.


but I am going to add a little bling bling :P


5) Arrange rhinestone
Use your base coat as adhesive, paint a little on the line where the red color meet the white. 

With your dotting tools, dip a little base coat on the tip as well for easy pick up of tiny little rhinestone, then arrange and attach the rhinestone. Wait until dry!


6) Top coat
Apply decent amount of top coat to seal your design and avoid chipping. ^^


You're DONE!!! Very easy~ ^3^


__________________________________________________________


Hope you like this nail tutorial~ ^^

Thank you for watching. XO

Be sure to check out my 


Follow me @
Twitter: http://twitter.com/gobbyhong
Weibo 微博 : http://weibo.com/gobbyhong
Instagram user name @gobihong

Will see you guys in my next blogpost.

Love,
Gobby

Thursday, 9 August 2012

Cooking : Imitate Shark Fin Soup 自家足料 - 碗仔翅

Hi Guys, today we are going to cook~ 
Yeah!!! I know you would be excited whenever I come up with a cooking recipe~ :P

Okay, usually I go for either dessert or western kind of food. But today we are actually going to cook chinese dishes. And it is a very popular street food / snack / refreshments in Hong Kong, which is Imitated Shark Fin Soup. ^^

Food is as it name, an imitation of Shark Fin Soup which is a more low-cost and popular substitute of the real shark fin soup we usually eat in chinese wedding banquet. But as eco as we can be, we better not to hunt and consume shark fin anymore. Therefore, we cook an imitated one which taste almost the same as the real one does. In my opinion, even better~ :P

So let's jump into the preparation first...


Video Demonstration:


Preparation:

We will need to prepare two dry ingredient
1) Black fungus
2) Chinese shiitake mushroom

They will need to soak in warm water for at least 6-7 hours before cook. Well as this process is quite time-consuming so I suggest to soak them before night. To avoid it not tender enough while cooking. :P


Ingredients:

1) Black fungus x 7-8 pieces
2) Chinese shiitake mushroom x 6-7 pieces
3) Skinless chicken leg x 1
4) Lean pork HK$15
5) Glass noodle x a bundle
5) Egg x 1

Soup
6) Chicken stocking x 1 whole box
7) Boiling water x 2 bowl

Seasoning
8) Old soy sauce x 1tbsp
9) Sesame oil x 1/2 tbsp
10) Salt (little bit)
11) White pepper (little bit)

Thickening
12) Water chestnut flour x 2tbsp
13) Cold water x 4tbsp


Steps:

1) Glass noodle soak in cold water until soft, drain & cut into half.

2) Beat up the egg and set it aside.

3) Chinese shiitake mushrooms, black fungus drain.

4) Remove the hard stems of the chinese shiitake mushrooms using kitchen scissors.

5) Press chinese shiitake mushroom using the side of chinese kitchen knife.

6) Then cut both chinese shiitake mushrooms and black fungus into thin slices.
(While cutting black fungus, you can fold them up or squeeze them up for ease o cutting)

7) Chicken leg remove bone and skin then cut into thin slices, so as lean pork.

8) When all the ingredient is cut into thin slices, set them aside first, we are going to prepare our stocking.

9) Turn on high heat, pour in whole box of chicken stocking into the bowl and add 2 bowl of boiling water, bring it to bowl.

10) Add in pork and chicken slices first, they will need more time to cook.
(Use a chopstick the separate them so they can heat up evenly)

11) Then add in chinese shiitake mushroom, black fungus & glass noodles and bring it to bowl again.

12) After it boil, add in seasoning and stir well (remember to mix-well before add to the soup)

13) Right after you stir in the seasoning, you can add in thickening, again mix-well before you add it to the soup. Continue stirring until the soup is thicken, you can tell by looking at the water bubble, it should looks a little bit gluey.

14) Turn off the heat and stir in the beaten egg. When adding egg to the soup, put chopstick into the soup and keep stirring in circular motion to create the PERFECT "Danhua" :P.

Yeah!!! You're done!!! Yummy!!!


Mum... this dishes you will need more patient in cut all the ingredients as
the preparation time is way longer than the actually cooking time.
And cooking basically don't need much of technique. :P

Real easy and taste delicious~ <3

__________________________________________________________


So... Hope you like this really easy Imitate shark fin soup. ^^

Thank you for watching. XO

Be sure to check out my 


Follow me @
Twitter: http://twitter.com/gobbyhong
Weibo 微博 : http://weibo.com/gobbyhong

Will see you guys in my next blogpost.

Love,
Gobby

Thursday, 2 August 2012

Nail How-to : Choosing nail polish remover

Hi Everyone!!!


Today I'm going to talk about how to choose nail polish remover


I know there are thousands of nail polish remover in the market but actually how to choose the right one for you. Today I have pick some commonly found nail polish removerand, so we take a look at the ingredients and see which one suits you.


What we found in the market:


So basically there are 3 main types of nail polish remover in the market
1) Acetone nail polish remover
eg. Cutex (center)


2) Acetone - FREE nail polish remover
eg. Superdrug (left), Honeybee Garden (right)


3) Oil base nail polish remover


I am going to compare Acetone and Acetone-FREE nail polish remover this time. As this two is the easiest to find and you can get it in the near by supermarket or drugstore. Oil base nail polish remover will be much difficult to get, you can get it either in Professional nail salon or order online. ^^


But before we go into detail some basic concept you might need to know...


How nail polish remover works!?


Did you ever questions about what is inside a bottle of nail polish? Well it can be very harmful and sad knowing the truth but I would say most of the nail polish is a potion of poison... :P


Nail polish got mainly 3 agent as basic. Coloring agent, Thickening agent & Solvent.
Solvent plays a very important role in nail polish as it mix and combine the other two. Making it a very liquidly consistence that can glide on really smoothly on your nail, it evaporate while you open it and that is how those funky kind of chemical smell you can breath in the air while applying nail polishes. It evaporate so it dries and stay on your nail.


So how is that related to the nail polish remover!?


Well, please take a good look at the ingredient list at the back of each nail polish remover bottle. You could easily find Acetone / Ethyl Acetate / ???? Acetate. All this are solvent of different efficiency. Some are stronger, some are not, but they work basically the same, to mix in with nail polish on your nail, dilute it so you can easily remove by a cotton pad.


Okay... you probably know how it works, so how to choose!?
Let me show you the pros and cons of the two main type of nail polish remover in the market.


Acetone nail polish remover


Turn around and see the ingredient label...
You should be able to find ACETONE in the very first line~!?


Pros:
1) Fast & efficient (can remove even stubborn glitter nail polishes)


Cons:
1) Strong chemical scent
2) Hash to your skin & nail 


Acetone- FREE nail polish remover
You should be able to find ETHYL ACETATE / ???? ACETATE in the first line~!?


Pros:
1) Gentle to skin
2) Mild scent


Cons:
1) Take a bit longer time
2) Not powerful enough to remove glitter nail polishes


My pick...

Well I think I am going to keep both at home.

Since you know me, I really HATE glitter nail polish... they are crazy difficult to take off. However in case I do wear them I really need Acetone-base nail polish remover to remove it., Acetone-FREE nail polisher remover will take ages to remove those stubborn glitter.

But for regular basis, I am going to go for Acetone-FREE nail polish remover, as they are gentle and just simply does the job. ^^

__________________________________________________________


Hope you like this nail how-to video &
Hopefully can help you out when choosing the right nail polish~ ^^

Thank you for watching. XO

Be sure to check out my 


Follow me @
Twitter: http://twitter.com/gobbyhong
Weibo 微博 : http://weibo.com/gobbyhong
Instagram user name @gobihong


Will see you guys in my next blogpost.

Love,
Gobby