Wednesday 25 April 2012

Nail : Perfect Gradient Nail

Hello everyone, today I am going to show you how to do this perfect gradient nail.


It is actually pretty simple to do but you will need a lot of patient ...^^

TOOLS

Okay... to start off you will need some tools,
As always my base coat is from:

1) Priti NYC #705 2-in-1 top base coat


this is my 2nd bottle... really love it~


Last one I finish it till the very last drop...which is very difficult for nail polishes...in my opinion :P


This is the 3 color I pick for this summery gradient nail, but before you put them on, you will need a pale opaque light color to sort of as a base color, so your nail color on top will be much "BOLD"er then you use just normally.


2) Pale beige : The Face Shop #BR801
3) Yellow : Priti NYC - #460 Horned Poppy
4) Baby Blue : Priti NYC - #499 Lungwort
5) Lime Green : The Face Shop #GR505


To finish up and seal the nail art in place, of course we will need a great top coat:
6) Seche Vite - Dry Fast Top Coat

This top coat dry super fast... it takes around 15 minutes to dry and it dry with a very thick and glossy finish which is prefect.


Other tools you will need are
7) Q-tips


8) Makeup Sponge
(... this is the key in this nail art...)


9) Nail polish remover


Video demonstration


Step 1 :
Base-coat, this is a must do step in my nail routine to act as a base so the nail polish on top won't direct get in contact with your nails... so your nail won't stain or damage that easily. 

Step 2 :
Paint a pale light color as a base color so the sheer color add on top could stand out even more.

Step 3 :
Wait 15 minutes until it dries.

Step 4 :
Measure the approximate area you need to paint to best fit your nail size. Here I am using the whole surface of the makeup sponge, as my nails are pretty big :P

Step 5 :
Paint on the makeup sponge, blue > green > yellow accordingly. As we all know blue mix with yellow is green color... so it will be a perfect blends of pastel color platte. 

First layer needs to be thicker so the sponge could soak up the nail polish.

Step 6 :
However, if you find yourself are adding too much, use a tissue paper and dap your sponge on it to absorb excess nail polish.

Step 7 :
Roll the sponge on your nail, remember to use 1 direction to create a well-blend effect.

Step 8 :
You will find it pretty messy after you do all your nails... so the next step you will need a lot of patient. 

Which is the cleaning step... so you take the q-tip and soak it with nail polish remover. Then just wipe off the nail polish on your finger tips....

...
...
... yes.. it may take a while...

Step 9 :
So afterwards, you will notice this sponge method create a little texture on your nail pattern but that's normal. As we are going to follow by topping off a thick shiny top coat so it smooth out all the imperfection. :P

Step 10 :
Final step is of course, wait until it dries and it usually take around 15-30 minutes... so no matter how busy you are, stay still and don't move... find something to do that don't need your hands...

Well... maybe watch videos... 
yup... that might be a good choice ^^... and
wah-la... you are done!!!


So... Thanks for watching. XO

Hope you all like this nail tutorial ^^
Will see you guys in my next blogpost.

Be sure to check out my 


Love,
Gobby

Wednesday 18 April 2012

Haul : Beauty find from Easter Korea trip ^^


Hello everyone, today i am going to show you a ton of beauty products that I have purchased from my Easter Korea trip. It Is really, crazy shopping again... and I am really.... "BROKE" now. T.T

Anyhow, still feel really happy to show you what I've got here~


ETUDE HOUSE

So the 1st thing I got is lipstick. I got this 3 lipstick from Etude house and they are launching their colorful lipstick there. This is the "Dear My - Blooming lips talk" with Dara from 2NE1 and Shinee in their TV commercial. Anyone have seen the japanese movie "Death Note"??? They are doing a sweet version of "Death Note" instead of someone will die if their name is written on the note. They changing it to "Kiss Note"... so if the name of that person is written on that note. He/she will give you a SWEET KISS. haha~ Love the concept.

Just to show you their TVC here.

So Kiss note with lipstick... that's the magic power ^^


Love the TV commercial and the lipsticks, I got 3 of them, those who know me well will know I am not really a lipstick girl but really can't help it. The whole range consist of about 2x color and I am just so thrill playing around with it. I pick up 3 shade #BE102, #RD303 & #PK004.


Packaging-wise is still etude house style of girly girly look. Pale pink plastic tube with a cute little bow in the front.


I have it on, that's #BE102, #RD303 & #PK004 from left to right.
Really opaque and creamy lipstick. Not-drying at all but still need to apply lip-balm underneath other wise the line will look a little obvious.


Other nail item is Mag play nail with magnet & two set of nail sticker from them. I think I will do an in depth review on this 3 items so I will just leave it right now. :P


Surprise - Essence Concealer also from etude house. I got the lightest shade and it is perfect for covering my super duper dark circles and brighten it up. Consistence is kind of thick but blend-able. You don't need a lot, a little goes a long long way.


A little bit of this can blend over to the whole area of the back of my hand. and coverage is good too.


Skinfood

I am looking forward to try this product for so long and Hong Kong still don't even have it in-stock. Luckily I found it in korea and it is the Red orange jelly BB SPF20 PA++ which is a BB cream. 

My friend who go to Skinfood store with me say "wow... it looks like pig grease 豬油膏"... I smile but it really is a perfect description of the texture. It is in jello form and it glide on so nice and light, provide medium to high coverage. Dry in a powder finish.


Really loving it... ♥ ♥ ♥ ♥ 


The Face Shop


Okay, my must good stop in nail polish shopping - The Face Shop.
Spring time and pastel color is hitting, definitely need to check out the face shop with wide range of color options from pastel to metallic to dark color. And they are surprising cheap.


banila co.

Banila co. is famous for it foundation and primer. And yes it really is as I drop by the store, it have about 6-8 different kinds of primer for different skin-type. My skin-type is oily so I picking up 2 hydrating primer (the one in metallic tube) and 1 classic matte primer (the one in white).


It instantly smooth your skin (I do think it may contains a little silicone base ingredient...anyhow) and prime your skin with moisture. It will so light and smooth afterward which is perfect for base makeup. ^^


That's all my great find in my korea trip.
Hoping you all have a wonderful day.
Will see you guys in my next v/blog.


Be sure to check out my 


Youtube channel : http://www.youtube.com/gobihomu
Chinese blog : http://gobbyhong.theztyle.com


Thanks for watching. XO


Love,
Gobby

Thursday 12 April 2012

DIY : Lace French Tip Shoes


Video demonstration here:


I have a pair of very comfortable shoes which I  bought from taobao last autumn season. It is a pair of very comfortable white oxford shoes with a special, edgy gold plate at the tip and cut out detail at the sides. 

I wore it most of the time when I go to work as it is just perfect to match with any of my working office lady-like outfit… just love love love it.

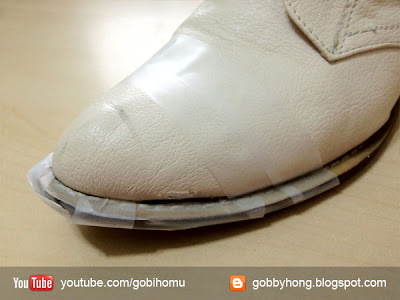
But somehow taobao product is not that durable. ( I think that's a well-known fact T.T) The gold plate of my right shoes fall off… I don't even realize that. Well I think it is because I am always late for work this March and I keep my feet running all the time in the morning to catch up my train and climb up stair… >.<

Anyhow… this is still a very comfortable shoes of mine and I just don't want to throw it away. That's why I plan to re-decorate it and make it like a brand new shoes again~ hahaha!!! I am thinking to paint my shoes black at the tip and also at the heel with a little feminine touch maybe.

So before I go into detail, here are

Some tools you will need to prepare:
1) Clear tape … I am using regular stationery clear tape
2) Removable tape (Scotch)
3) Thin fabric lace
4) Spray paint #Matte black


Step 1: Remove the gold plate for the other shoes…
-3-… this part is the MOST DIFFICULT & TIME CONSUMING. You may need scissor and cutter to assist.

Step 2: Cover up
Use the removable tape to cover the area which you don't want to spray on, in my case it will be the whole shoes except the tip and the heel part.

>.<… I am demonstrating a very lazy way as I just cover the area right above the tip and the heel part. To be more safe and care-free. You do need to cover the whole shoes… you will know the reason afterwards.


Step 3: Lace-up
I am doing it a little differently just to add on a feminine touch. I measure a portion of thin lace which just fit to cover the very tip part of my shoes when i want the spray section to begin. Then position the lace with clear tape at both ends. So when you spray the paint, it will create a very uniform lace pattern. ^^


Step 4: Spray
The most challenging part that need extra attention.

Bring your shoes out to an open area, cover the area with some out-dated newspaper. (you don't want to paint the floor)

Try at one corner, spray on it to get familiar with how much the product will come out first. Then spray on your shoes with a 30cm distance. Do you shoes 1 after the other.

This part you see I am doing it pretty close as I haven't cover up the whole shoes, and I am worry the paint will get on the area that I don't want them to touch… So that's why. (Try cover all the part you don't want to spray while you do it :P)


Step 5: Remove the tape
Step 6: Quick fix for imperfection
The lace pattern on my right shoes is so blurry as I am spraying the paint to closely.
Well… I may need to paint it all black again. Anyway. My left shoes looks perfect.

In this moment, you should get with you a brush just to get into some of the corner and area that is hardly reach just to do a little touch up.


Step 7: Wait overnight until it is completely dry

Wha-la. You're DONE!!!
Although only one shoe will have the lace pattern (well that might add a little character… hahahaha), it looks great and it looks like a brand new one. ^^


So I hope you enjoy this my DIY project.
For more information or interesting post, you can check out my


And I will see you guys in my next vlog or blog ^^.

Love,
Gobby