Video demonstration here:
I have a pair of very comfortable shoes which I bought from taobao last autumn season. It is a pair of very comfortable white oxford shoes with a special, edgy gold plate at the tip and cut out detail at the sides.
I wore it most of the time when I go to work as it is just perfect to match with any of my working office lady-like outfit… just love love love it.
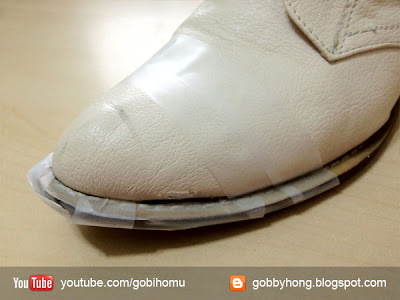
But somehow taobao product is not that durable. ( I think that's a well-known fact T.T) The gold plate of my right shoes fall off… I don't even realize that. Well I think it is because I am always late for work this March and I keep my feet running all the time in the morning to catch up my train and climb up stair… >.<
Anyhow… this is still a very comfortable shoes of mine and I just don't want to throw it away. That's why I plan to re-decorate it and make it like a brand new shoes again~ hahaha!!! I am thinking to paint my shoes black at the tip and also at the heel with a little feminine touch maybe.
So before I go into detail, here are
Some tools you will need to prepare:
1) Clear tape … I am using regular stationery clear tape
2) Removable tape (Scotch)
3) Thin fabric lace
4) Spray paint #Matte black
Step 1: Remove the gold plate for the other shoes…
-3-… this part is the MOST DIFFICULT & TIME CONSUMING. You may need scissor and cutter to assist.
Step 2: Cover up
Use the removable tape to cover the area which you don't want to spray on, in my case it will be the whole shoes except the tip and the heel part.
>.<… I am demonstrating a very lazy way as I just cover the area right above the tip and the heel part. To be more safe and care-free. You do need to cover the whole shoes… you will know the reason afterwards.
Step 3: Lace-up
I am doing it a little differently just to add on a feminine touch. I measure a portion of thin lace which just fit to cover the very tip part of my shoes when i want the spray section to begin. Then position the lace with clear tape at both ends. So when you spray the paint, it will create a very uniform lace pattern. ^^
Step 4: Spray
The most challenging part that need extra attention.
Bring your shoes out to an open area, cover the area with some out-dated newspaper. (you don't want to paint the floor)
Try at one corner, spray on it to get familiar with how much the product will come out first. Then spray on your shoes with a 30cm distance. Do you shoes 1 after the other.
This part you see I am doing it pretty close as I haven't cover up the whole shoes, and I am worry the paint will get on the area that I don't want them to touch… So that's why. (Try cover all the part you don't want to spray while you do it :P)
Step 5: Remove the tape
Step 6: Quick fix for imperfection
The lace pattern on my right shoes is so blurry as I am spraying the paint to closely.
Well… I may need to paint it all black again. Anyway. My left shoes looks perfect.
In this moment, you should get with you a brush just to get into some of the corner and area that is hardly reach just to do a little touch up.
Step 7: Wait overnight until it is completely dry
Wha-la. You're DONE!!!
Although only one shoe will have the lace pattern (well that might add a little character… hahahaha), it looks great and it looks like a brand new one. ^^
So I hope you enjoy this my DIY project.
For more information or interesting post, you can check out my
Youtube channel: http://www.youtube.com/gobihomu
Chinese blog: http://gobbyhong.theztyle.com
Weibo.com: http://weibo.com/gobbyhong
And I will see you guys in my next vlog or blog ^^.
Love,
Gobby


i came here from your post in theZ. a HKer^^
ReplyDeletelike your 'new' shoes
btw,your idea is so great,very environmentally friendly lol
keep it up,followed u ;)
Thanks ^^ You guys are awesome always give me inspiration on new project and idea.
DeleteLove to interact with you. Keep in touch~ :P